Monday, November 28, 2011
Crappy Housewife Tip of the Day
Not sure if those leftovers are still good? Just put off dealing with them for a few more days. Then they definitely won’t be good, and you won’t feel so guilty throwing them out.
Sunday, November 27, 2011
Crappy Housewife Tip of the Day
When you are doing a bunch of laundry and know that there is no way you are going to get around to folding it all, fold one large item in the load and set it on the top of the unfolded laundry in the basket. This way when you come back to the unfolded stuff a week later you won't mistake the unfolded mess for dirty laundry. Also, saves you from the sniff test to check if stuff is clean or dirty!
(Submitted by Trish)
(Submitted by Trish)
Friday, November 25, 2011
Crappy Housewife Tip of the Day
Hate sorting socks? Get rid of all your socks and replace them with several packs of the exact same kind. No more sorting! Just put them all in the drawer. When you need a pair, grab two and go!
(Submitted by a whole bunch of people. I actually did this with my husband's socks - he has only two kinds of socks, now, ankle socks and long socks, all the same. I like variety in my sock drawer too much to do this for myself, but it's tempting!)
(Submitted by a whole bunch of people. I actually did this with my husband's socks - he has only two kinds of socks, now, ankle socks and long socks, all the same. I like variety in my sock drawer too much to do this for myself, but it's tempting!)
Wednesday, November 23, 2011
Crappy Housewife Tip of the Day
Join a gym. It's amazing how many productive things I get done around the house when I'm putting off going to the gym.
Monday, November 21, 2011
Crappy Housewife Tip of the Day
Before you mop, empty your trash can, then use it as a mop bucket. This helps get some of the garbage-stink out of the trash can, and it saves you having to remember where you put the mop bucket.
Friday, November 18, 2011
Crappy Housewife Tip of the Day
If you have kids who tend to think that "playing with" toys is the same as "dumping out" toys, minimize the clean-up by putting away Lego in clumps of 5 or 6 bricks. Putting away 20 clumps is easier than putting away 100 individual bricks. (Or, you know, just hide the Lego completely.)
Thursday, November 17, 2011
Crappy Housewife Tip of the Day
When you put bibs in the laundry hamper, turn the pockets inside out. (Unless you like finding cheerios in your clean laundry.)
Aside: I was going to say, "Wash bibs with the pockets inside out," but doing it when you put them in the hamper lets you get out the nastiest goop right now, rather than letting it rot in the hamper. It also gives you a second chance to do it when you are transferring them to the washer, in case you forgot the first time.
Aside: I was going to say, "Wash bibs with the pockets inside out," but doing it when you put them in the hamper lets you get out the nastiest goop right now, rather than letting it rot in the hamper. It also gives you a second chance to do it when you are transferring them to the washer, in case you forgot the first time.
Wednesday, November 16, 2011
Crappy Housewife Tip of the Day
Place a sock basket in you laundry room and when socks are done, just put them in the basket. If someone wants socks, they can find the mate!
(Submitted by Scatterbrained Homemaker)
(Submitted by Scatterbrained Homemaker)
Tuesday, November 15, 2011
Crappy Housewife Tip of the Day
It doesn’t matter that the trash has been overflowing for days. It doesn’t matter that taking out the trash is his job. He won’t notice. Just take the trash out yourself.
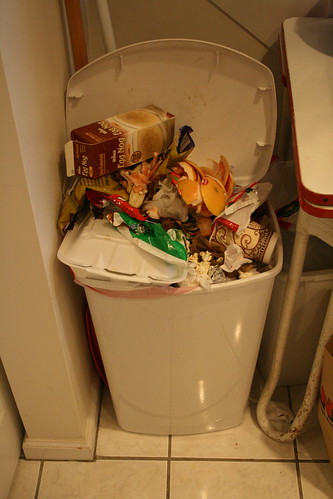
Or, alternatively, you can always reframe your laziness as righteous indignation:
"But it's been overflowing for days! Taking the trash out is his job! I'll just pile a few more things on, and he's bound to notice!!"
(When in doubt, take a picture and blog about it.)
Or, alternatively, you can always reframe your laziness as righteous indignation:
"But it's been overflowing for days! Taking the trash out is his job! I'll just pile a few more things on, and he's bound to notice!!"
(When in doubt, take a picture and blog about it.)
Monday, November 14, 2011
Crappy Housewife Tip of the Day
Keep a wide assortment of brushes near the kitchen sink for getting congealed gunk out of grooves. One size does not fit all. I have a bottle brush for bottles, a pipe cleaner for one kind of sippy cup, a paint brush for another kind of sippy cup, and a stiff brush for cheese graters and my dimpled frying pan.
Saturday, November 12, 2011
Crappy Housewife Tip of the Day
If you have a griddle or Foreman Grill, you can clean it by putting it on medium heat and setting a wet wash cloth/paper towel on it. When it has steamed a while, use another cloth/paper towel to clean it off. Use cool water to avoid burning your own hand.
(Submitted by Scatterbrained Homemaker)
(Submitted by Scatterbrained Homemaker)
Thursday, November 10, 2011
Crappy Housewife Tip of the Day
When baking, line cookie sheets with parchment paper. Not only does it stop the cookies from sticking to the pan, but it makes clean-up literally as easy as throwing the parchment paper in the trash and putting the cookie sheet straight back in the cupboard. (I also line loaf pans with tinfoil for the same effect. You can use the tinfoil to lift the banana bread straight out of the pan, then just put the pan back in the cupboard.)
Wednesday, November 9, 2011
Crappy Housewife Tip of the Day
So you bought a brand new glue stick, and after your first craft using it, a forgetful child leaves the cap off. When you finally get around to cleaning up the craft several days later, it is a shriveled peg of dried glue. Oh well, throw it out, right? Wrong! You can rehydrate dried-out glue sticks! Just fill with water, stick the cap on, and leave it overnight. Tomorrow morning, you will have a brand new glue stick again!
Monday, November 7, 2011
Crappy Housewife Tip of the Day
While waiting for hubby to bring cans of soup home for supper, boil water in the kettle to get a head start. Then when the soup comes, you only really have to boil the condensed soup. It's "souper" fast!
(Submitted by Julia)
(Submitted by Julia)
Sunday, November 6, 2011
Crappy Housewife Tip of the Day
Take the padded cover off of the high chair; the hard plastic underneath is much easier to clean.
Saturday, November 5, 2011
Crappy Housewife Tip of the Day
When you make Jell-O, save yourself a dish and bypass the serving bowl. Divide the unjelled liquid evenly between dessert bowls or ramekins and let it set in them. Not only does this save you from washing an unnecessary dish, but it also looks fancier. It's always win-win when lazy makes you look fancy.
Thursday, November 3, 2011
Crappy Housewife Tutorial: Circuit Cleaning
Your kitchen counters.
Home of dirty dishes, appliances, and tons of other random crap that just accumulates there no matter how hard you try to keep it away. And you know that the only way to clean them properly is to remove all that crap and scrub them, but there's just so. much. crap. And besides, where else is it all supposed to go? So, you shove stuff to the side, and wipe the bits you can see, and before you know it, the toaster oven is glued to the counter with some kind of mystery substance.
Circuit cleaning lets you deep clean without having to relocate all that stuff. You start by clearing out one manageable section of counter, cleaning it thoroughly, then putting everything back and moving on to the next section. (Note: this method also works on other cluttery areas, like mantels or bedrooms.) It's really pretty simple, and you're probably already doing it, but since I've been neglecting this blog (and my house) lately, I deep-cleaned my kitchen and made a photo tutorial. These pictures span one day, during which I was home alone with a one-year-old and a three-year-old, so it really only shows a few hours or less of actual work. The difference a few hours makes (to me at least) is pretty mind-blowing.
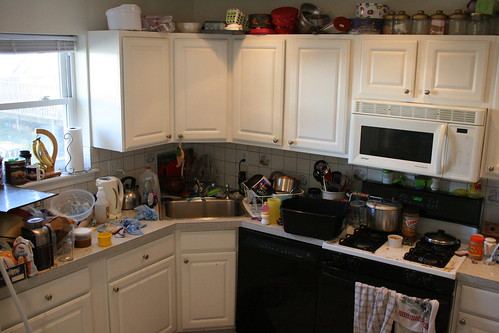
BONUS TIP: Did you notice all the dirty dishes in that last picture? No? That's because my sister gave me the most awesome Crappy Housewife Tip, which I started using as soon as I made a trip to the store and bought the biggest dish tub they had in stock. Look back at the after picture of the whole kitchen. See the big black tub? It's full of dirty dishes. But because they are in a TUB, they have a place to be without cluttering up the counter or the sink. Brilliant. Thanks, sis!
Home of dirty dishes, appliances, and tons of other random crap that just accumulates there no matter how hard you try to keep it away. And you know that the only way to clean them properly is to remove all that crap and scrub them, but there's just so. much. crap. And besides, where else is it all supposed to go? So, you shove stuff to the side, and wipe the bits you can see, and before you know it, the toaster oven is glued to the counter with some kind of mystery substance.
Circuit cleaning lets you deep clean without having to relocate all that stuff. You start by clearing out one manageable section of counter, cleaning it thoroughly, then putting everything back and moving on to the next section. (Note: this method also works on other cluttery areas, like mantels or bedrooms.) It's really pretty simple, and you're probably already doing it, but since I've been neglecting this blog (and my house) lately, I deep-cleaned my kitchen and made a photo tutorial. These pictures span one day, during which I was home alone with a one-year-old and a three-year-old, so it really only shows a few hours or less of actual work. The difference a few hours makes (to me at least) is pretty mind-blowing.
- Do enough dishes to thin the herd. You need to be able to see at least SOME countertop. (I apologize for not having a proper "before" picture. I decided to do the tutorial after I had already washed a bunch of dishes.)
- Pick a corner to clean first. Start far from the sink and work towards it. I usually choose to start in the corner that it the most entrenched in junk. For me, this is my cookbook/coffee corner.
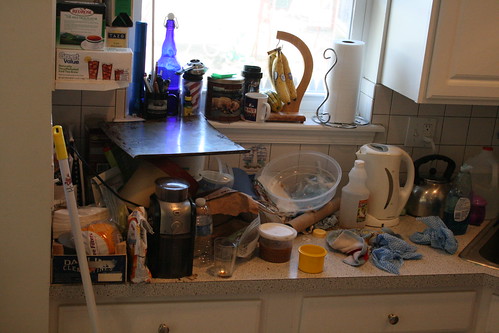
- Clear away an approximately two-foot-wide section of counter. Put dirty dishes by the sink. It doesn't really matter where you put other things - I mostly just move them to another section of counter - but if you have something in your hand that can be put away, by all means, put it away.
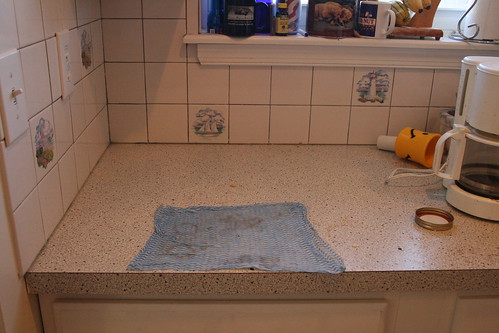
- Ew. That counter is gross. Well, you know the Crappy Housewife motto, "Let it soak." Throw a wet cloth over those gross blobs. Now go wash a dish or two while you let the water do its magic.
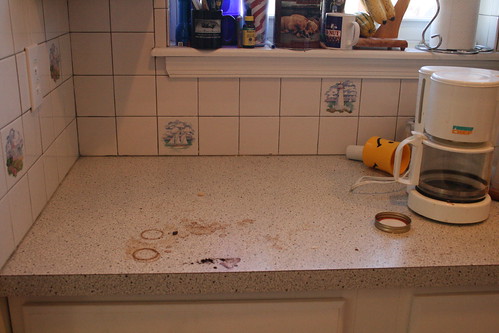
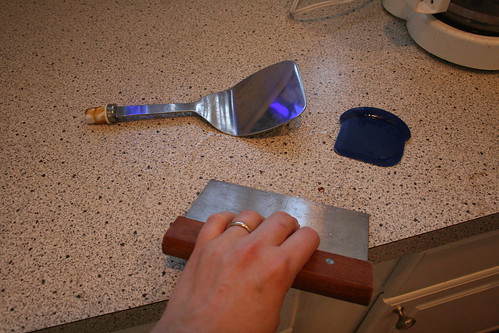
- Wipe up the gross stuff under the cloth. Then clean the rest of the counter thoroughly with soapy water (or other cleaning product). Use your scraper of choice to loosen any tough globs. (The picture below shows my three favorite scrapers - a spatula, a pizza stone scraper and a big dough cutter thingy.) Personally, I like to scrape the big metal scraper across the whole countertop, just in case there are invisible globs that my cloth missed. Dry the counter well with a towel.
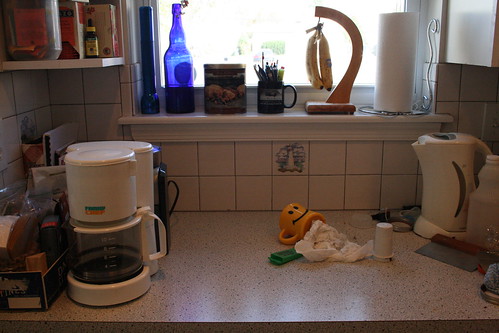
- Put everything back in the first section that belongs there. Honestly, even if nothing gets put away, just having it sit in nice rows on a clean counter makes your whole kitchen look better. Clear the next section of counter. (Which, in this case, included a very cluttered windowsill.)
- Clean surfaces, replace crap.
- Clear the next section of counter, up to the sink. When you get to the sink, stop. You'll come back later and do the sink last. I have a good reason for this.
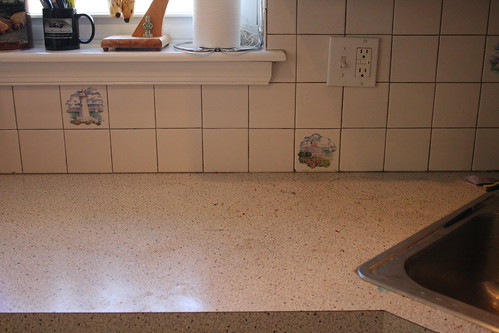
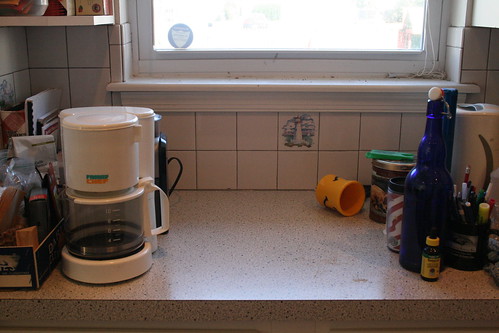
- Clean section, replace crap. Left half of counter complete:

Right half of counter still nasty: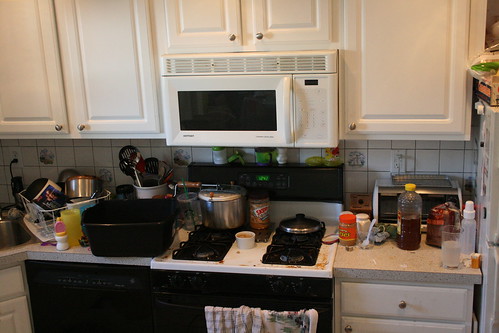
- Jump to the other corner, and repeat the process on that section of counter. Clear, clean, replace. Whenever you move an appliance, it's a nice idea to wipe it down before replacing it, including the little rubber feet that somehow always seem to be encased in something gooey.
- The next section of counter is actually the stove, which desperately needs cleaning. Remove all removable components from the stove and put them in the sink to soak (this is why we didn't clean the sink, yet).
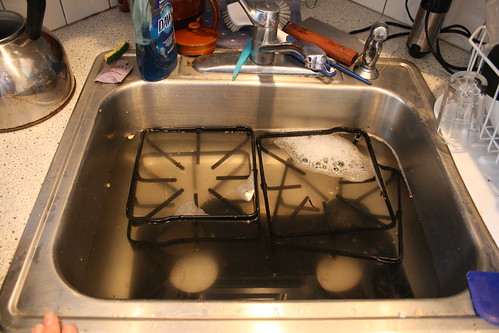
Put wet cloths all over the surface of the stove to soak.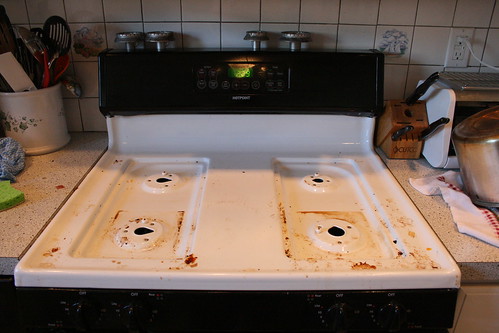
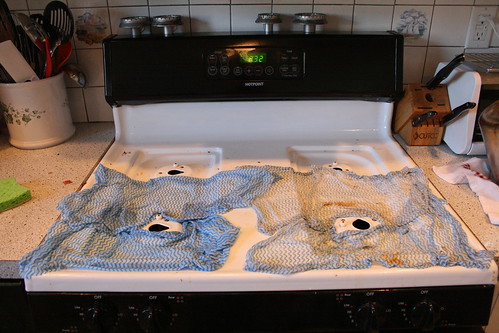
- Okay, this stove-soaking project is going to take a while. You can clear the next section of counter while you wait.
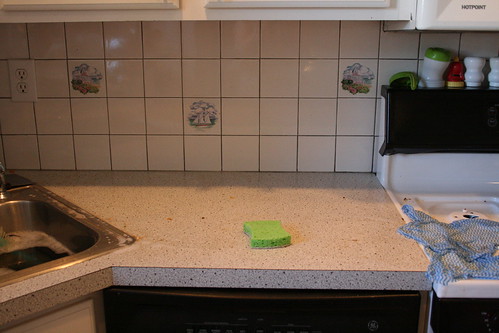
- Clean the surface of the stove, clean the next section of counter, then wash all the stove components you removed. Dry them and reassemble the stove.
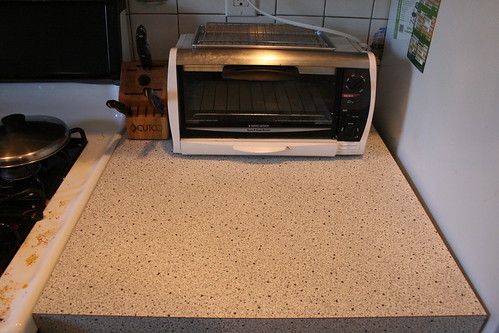
- Now all that's left is the sink and the stuff behind it. I don't actually have another place to put most of this stuff, so these before and after photos will show you how much of a difference the remove/clean/replace system makes even when you keep the clutter.
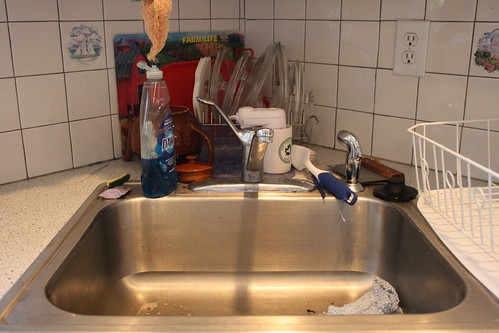
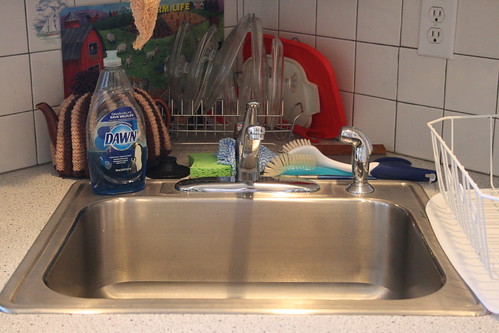
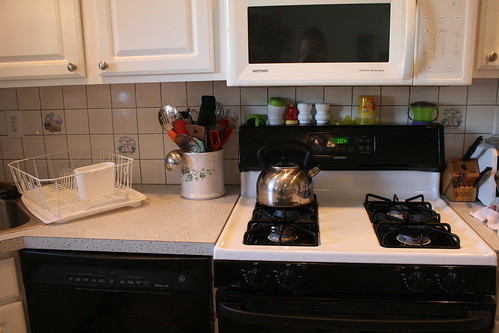
- Step back and enjoy the view. (Just don't look at the floor, which suddenly looks so much worse in juxtaposition with the counters.)

BONUS TIP: Did you notice all the dirty dishes in that last picture? No? That's because my sister gave me the most awesome Crappy Housewife Tip, which I started using as soon as I made a trip to the store and bought the biggest dish tub they had in stock. Look back at the after picture of the whole kitchen. See the big black tub? It's full of dirty dishes. But because they are in a TUB, they have a place to be without cluttering up the counter or the sink. Brilliant. Thanks, sis!
Crappy Housewife Tip of the Day
Ditch the kitchen washcloths. It seems like no matter how good I am at wringing them out and hanging them up when I am done, dishcloths get stinky fast. Sometimes it seems like they're only good for a day or two before they smell too gross to use. And if you let them sit too long before washing them, that mildewy stink lingers, and they smell bad again the first time you use them.
Instead, get yourself some Handi Wipes (USA) or J Cloths (Canada). Imagine a halfway point between a paper towel and a washcloth, and there you have these (which don't seem to have an easy shorthand other than brand name, so I just call them "blue cloths"). Handi Wipes are $2 for a six-pack, which is about what you would pay for one or two washcloths.
But they're not just cheaper. Here are some of the many things I love about blue cloths:
-When you wring them out after using them, they get almost completely dry. You don't even need to hang them up; if you squeeze all the water out and leave them in a blob on the counter, when you come back a few hours later, the blob will be completely dry. And, if you recall your middle school science lessons, bacteria need moisture to thrive, so a dry cloth is a non-bacteria-y cloth. (Non-bacteria-y is totally the scientific term.)
-You can wash them in the washing machine. So, when they do get gross (usually because I let them sit inside a gross sink or something), you can just toss them in the wash. They only survive a handful of washings, because they are not designed to last forever, but they can go longer between washings because they dry out completely and don't get stinky. (I recommend air-drying them, though, the dryer makes them break down faster.)
-I don't feel bad throwing them out. So, if I have to clean up something really gross (I will spare you the examples), then I can just toss them, guilt-free. Their disposableness also makes them an awesome choice for outings and camping trips. In fact, they would also be an awesome thing to keep in the diaper bag. (Why didn't I think of that before? I'm going to go put one in there right now.)
-Because they come in multi-packs, I always have a bunch of them on hand. So when I am doing a big job, like cleaning all the kitchen counters, I can use several of them to soak more sections of counter at one time. I keep one on the high chair to use on faces, another by the sink to use on dishes, and another under the sink for cleaning.
Sorry, I didn't mean to make that sound so much like a commercial. I assure you that neither Handi Wipes nor J Cloths are paying me any money to say this stuff, I'm just a satisfied consumer/zealot. These things are awesome. Try them sometime.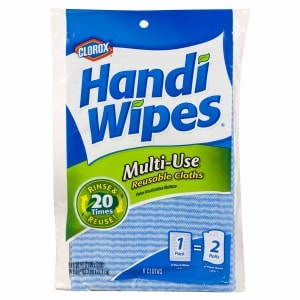
Subscribe to:
Comments (Atom)